| Inkscape » Text » Creating Text |    |
|---|
Text is created with the Text Tool. To add
text to a document, select the tool by clicking on the
![]() icon (F8 or t) in the
Tool Box.
icon (F8 or t) in the
Tool Box.
![[Note]](../images/admons/note.png) | Note |
|---|---|
|
The Text and Font dialog has an entry box for entering text on the Text tab. This entry box will not be active unless some preexisting text object is selected or at least one character is entered into a new text object using the Text Tool. This is because a text object must be created first. Simply clicking on the screen with the Text Tool does not create an object. |
There are two ways to add text to an Inkscape drawing. The first is as regular text. In this case, as text is typed, the text box grows to accommodate the text. Line breaks must be manually added.
The second way to enter text is as a flowed text object. The text is typed into a presized rectangular text box. Line breaks are automatically made. The flowed text object includes both the box and text and is thus moved and transformed as such. For a discussion of flowed text in an arbitrary shape, see the last section in this chapter.
A few things to note that apply to both entry methods:
If you click on an already existing text object with the Text Tool, the text object will be selected and the cursor will be placed between the letters closest to where you clicked. The text can then be edited.
Many of the keyboard shortcuts will not work while in the enter text mode. The + and − keys on the numeric keypad will type the corresponding characters if Num Lock is on; otherwise, they retain their zoom functions.
Special characters can be entered by two different methods:
Unicode Mode: In this method, special characters are entered by typing in Unicode values. To toggle between normal and Unicode modes use Ctrl+U. Once in Unicode mode, type in the two to four digit hexadecimal Unicode value followed by the Space bar. Repeat to add more characters. Typing any non-hexadecimal character or Esc while in Unicode mode will return you to normal mode.

Glyphs Dialog:
New in v0.48.
You can use the Glyphs dialog to enter special
characters. Open the dialog by using the menu entry
→
![]() Glyphs.... In the dialog, you can choose in which
font family and style you wish to search. Available characters
will depend on the font. You can also limit the search to
specific
Scripts or Unicode
Ranges by using the two drop-down
menus. Once you have found the character you want to
add, double-click on it with
the Left Mouse Button. This will add the
character to the entry box at the bottom left of the
dialog. Click the Append button to add
the characters to a selected text object. Note that you must
have already created a text object. A text object is not
created until at least one character has been entered (just
clicking on the canvas with the Text Tool does not create a
text object).
Glyphs.... In the dialog, you can choose in which
font family and style you wish to search. Available characters
will depend on the font. You can also limit the search to
specific
Scripts or Unicode
Ranges by using the two drop-down
menus. Once you have found the character you want to
add, double-click on it with
the Left Mouse Button. This will add the
character to the entry box at the bottom left of the
dialog. Click the Append button to add
the characters to a selected text object. Note that you must
have already created a text object. A text object is not
created until at least one character has been entered (just
clicking on the canvas with the Text Tool does not create a
text object).
Note that you should use either the Script or Range menus as they independently limit the list of characters shown. If you select “Latin” in the Script menu and “Greek and Coptic” in the Range no characters will be shown. The reason for having two different menus is that many scripts have characters in multiple ranges. If you want all “Latin” characters use the Script menu. If you already know that the character you want is in the “Latin B” block use the Range menu.

One problem you may encounter with saving text in SVG files as text objects is that if the font is not available on the computer where the file is to be viewed, it may not be visible. To avoid this problem, you can convert the text to a path. This, though, will prevent the text from being edited as a text object (and it makes your SVG less accessible and indexable).
![[Tip]](../images/admons/tip.png) | Tip |
|---|---|
|
Make a duplicate of the text before you convert the text to a path. Put the copy on a separate layer and make that layer invisible. Then if you ever need to edit the text as a text object, you will have a copy available. |
When a text object is selected, a small square is shown at the left of the first line's baseline. This is the baseline anchor, which is used for snapping and alignment.
To add regular text, click on the document where you desire the text to start. You should see a cursor (blinking bar) indicating you are in the text enter mode and showing where the text will start. To add text, just start typing. You can enter multiline text by inserting a carriage return. The text box will grow as text is entered.

| SVG and Regular Text |
|---|---|
|
Regular text created by Inkscape is always inside a <tspan> object that is wrapped by a <text> object. The first <tspan> in a line is marked by a private Inkscape attribute to indicate it is the start of a new line. This is how Inkscape knows how to insert new lines in the middle of a section of text and move the following lines down (SVG includes no such mechanism). Text in SVG files created not by Inkscape will be missing this attribute and may be structured differently. Inkscape may have problems editing such text. |
![[Warning]](../images/admons/warning.png) | SVG and Flowed Text |
|---|---|
|
Flowed text was a draft SVG 1.2 specification that will not in the end be adopted. The text is not likely to be viewable by other renderers. In addition, some programs will not render any of a file with flowed text (Squiggle, for example). You can convert the flowed text to a regular text object before saving to avoid this problem. |
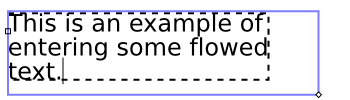
To add flowed text, click-drag on the document with the Text Tool to create a blue rectangle box for the text. Once the box is drawn, you can move the cursor into the box area and begin to type. Carriage returns are automatically made. Prior to v0.48, if the text fills the box, you cannot add more text with out enlarging the box. As of v0.48, you can add text but it will not be shown. Instead the rectangle will turn red to indicate that not all the text is displayed. The box can be enlarged or the proportions changed by dragging on the handle at the lower-right side with the Text Tool, Node Tool, or any of the shape tools; however, the text box will only be shown when using the Text Tool. Use the Ctrl key while dragging to constrain the change in box size to a horizontal or vertical direction. The box and text can be moved together.
| |  | |
| Chapter 9. Text |  | Selecting Text |
© 2005-2017 Tavmjong Bah. |  |