Red Spiral

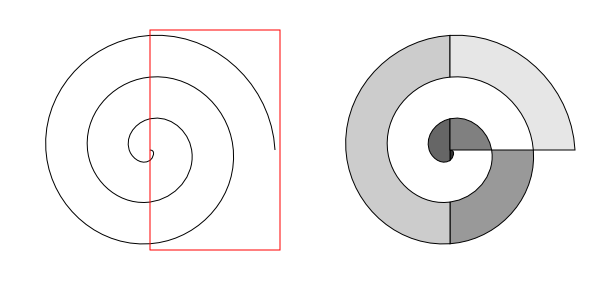
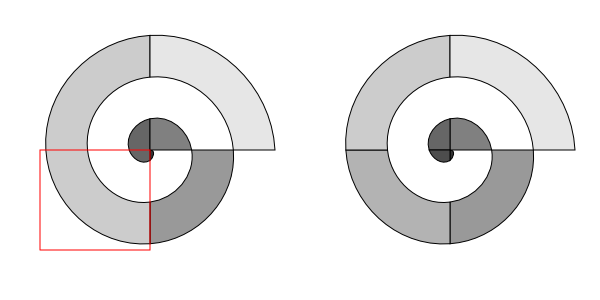
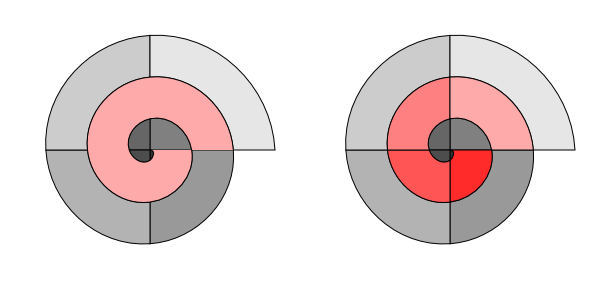
Procedure D.1. Drawing the Spiral

  1. Create a Grid and enable snapping to it.
  2. Create a three-turn spiral with the Spiral Tool, placing the Outer handle directly right of the Inner handle.
  3. Draw a rectangle that passes through the Inner handle and encloses the right half of the spiral.
  4. Use rectangle to divide spiral (Path icon Division ( Ctrl+/ )).
    Red Spiral 1.
    Left: Rectangle encloses right half of spiral. Right: After using rectangle to divide spiral (gray fills added for clarity).
  5. Draw rectangle that has upper-right corner at center of spiral and encloses lower-left quarter of spiral.
  6. Use rectangle to divide spiral (Path icon Division ( Ctrl+/ )).
    Red Spiral 2.
    Left: Rectangle (red) encloses lower-left quarter of spiral. Right: After using rectangle to divide spiral (gray fills added for clarity).
  7. Draw duplicate spiral to first spiral. Change number of Turns to two in the Tool Controls.
  8. Divide new spiral following same procedure as used for first spiral.
    Red Spiral 3.
    Left: New spiral (red fill added for clarity). Right: After dividing new spiral into pieces (red fills added for clarity).
  9. Add a radial Gradient to one section. Set the center Stop to black and the outer Stop to red. Make sure center handle is at the center of the spiral and each of the outer handles are at the corners of the section as shown below (use node snapping).
  10. Copy style of section with Gradient and paste to all the sectors (Edit icon Paste Style ( Shift+Ctrl+V )).
    Red Spiral 4.
    Left: Radial gradient added to one section; gradient handles are displayed. Right: Style copied to all sections.
  11. Select section to left of outer-most section (see below). With Gradient Tool, adjust gradient by rotating in 90° (be careful not to move center handle). Move outer handles to corners of section.
  12. Repeat adjusting gradients in each section. The gradient should be rotated an additional 90° for each adjacent section.
    Red Spiral 5.
    Left: Radial gradient adjusted in one section. Right: All radial gradients adjusted.
  13. Remove Stroke for all sectors.
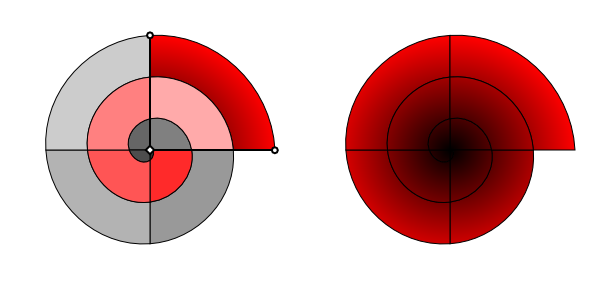
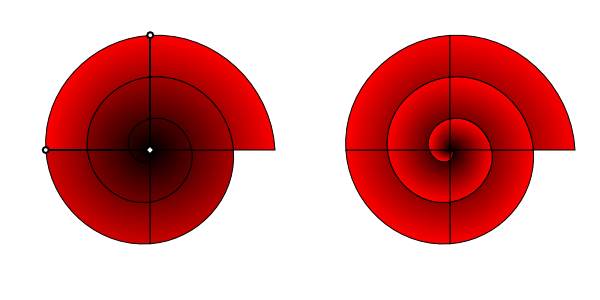
  14. In theory, you are done, but there is one small problem: At certain zoom levels, you can see white cracks between the sections. These cracks are the result of two problems: The first is that the Inkscape renderer is flawed when two objects abut each other (Batik, Firefox, and Opera don't have this problem). The second is that the spirals are not perfectly drawn.

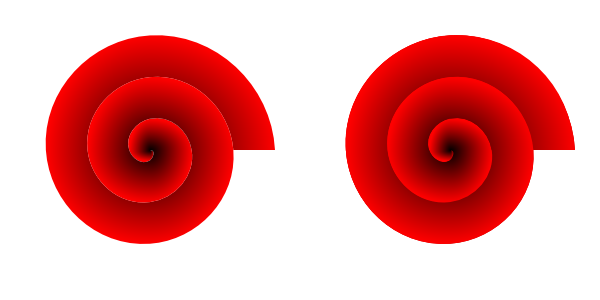
    The easiest way to reduce the visual effect of this problem is to duplicate the spiral, create a union of all the duplicate sectors, change the color to dark red, and move the new object behind the spiral.

    Perhaps a better, but more complicated, solution is to duplicate the spiral, group the sections, rotate the duplicate a couple of degrees clockwise, put the duplicate behind the original, and adjust a couple of nodes in the duplicate at the outer end of the spiral so the duplicate does not stick out.

    Red Spiral 6.
    Left: The finished spiral. Right: The finished spiral with a second spiral, rotated and adjusted, behind it.